Guides
Posted in

How to Check Your Fencing Uniform: 6 Important Items to Check for Safety and Durability

how to check your fencing uniform

Your fencing uniform is the first and most important layer of protection you wear every time you step onto the strip. Far more than athletic clothing, this gear is engineered to resist punctures, absorb impact, endure explosive footwork, and keep you safe from the demands of modern fencing. But even the strongest uniform materials eventually wear down — which makes understanding how to check your fencing uniform one of the most essential maintenance habits for any fencer.

In this comprehensive guide, you’ll learn exactly how to check your fencing uniform for early-stage wear, hidden damage, and safety issues before they become serious. We’ll walk through the six most important items to inspect — jacket, pants, plastron, mask, glove, and baselayers — along with a complete pre-tournament safety checklist, longevity tips, and specific cues that tell you when something must be repaired or replaced. Whether you’re a competitive fencer, a parent buying gear for a youth athlete, or a coach helping students stay safe, this guide ensures your uniform remains durable, compliant, and ready for the strip.

Why Learning How to Check Your Fencing Uniform Matters

Before diving into the direct breakdown of how to check your fencing uniform, it’s important to understand why these inspections matter. Fencing clothing experiences extreme mechanical stress: lunges, deep knee bends, quick torso rotations, repeated weapon contact, sweat absorption, and laundering cycles. Over time, even the strongest 350N or 800N materials begin to fatigue.

Here’s why every fencer should routinely inspect their uniform:

1. It Protects You From Injury

Your fencing uniform is designed to prevent punctures and absorb hits. But as fabrics thin and seams loosen, the risk of injury increases. Understanding how to check your fencing uniform ensures you’re protected every time you fence.
If your jacket or pants are reaching end-of-life, upgrading to Prieur FIE-certified fencing jackets can significantly improve your protection and longevity.

2. Uniform Failures Are More Common Than You Think

We see it all the time in clubs: a seam pops mid-lunge, a bib starts to separate during a tournament, a glove rips just before an elimination bout. Most failures start as tiny signs fencers often overlook.

3. Strict Tournament Equipment Control

Nothing derails your competition more than failing inspection because of a small issue that could’ve been caught at home. Learning how to check your fencing uniform helps prevent stressful last-minute replacements.

4. Early Detection Saves Money

Minor repairs cost a few dollars. Replacing full uniforms costs much more. Regular inspections extend lifespan and save you money over time.

5. Confidence Comes From Preparedness

When you trust your gear, you fence boldly and comfortably. Knowing how to check your fencing uniform builds that confidence.

How Often Should You Check Your Gear?

Learning how to check your fencing uniform is one thing — but developing a routine keeps your gear in top shape. Here’s what most fencers should follow:

Quick Pre-Practice Scan (30–60 seconds)

A fast check for:

  • Tears, holes, or open seams

  • Mask dents

  • Loose straps

  • Weak Velcro

  • Glove holes

This prevents obvious problems from becoming dangerous.

Weekly Deep Inspection (5–10 minutes)

Once per week, inspect:

  • Jacket seams and underarm panel

  • Pants stretch zones

  • Mask bib stitching

  • Glove palm wear

  • Plastron fabric integrity

This is where you catch evolving issues.

Full Pre-Tournament Inspection (10–15 minutes)

Before any tournament, this is essential. You’ll mimic what equipment control looks for — more on that later.

For storage between inspections, we recommend the ventilated Prieur Elite Bag, which helps prevent sweat damage and mold.

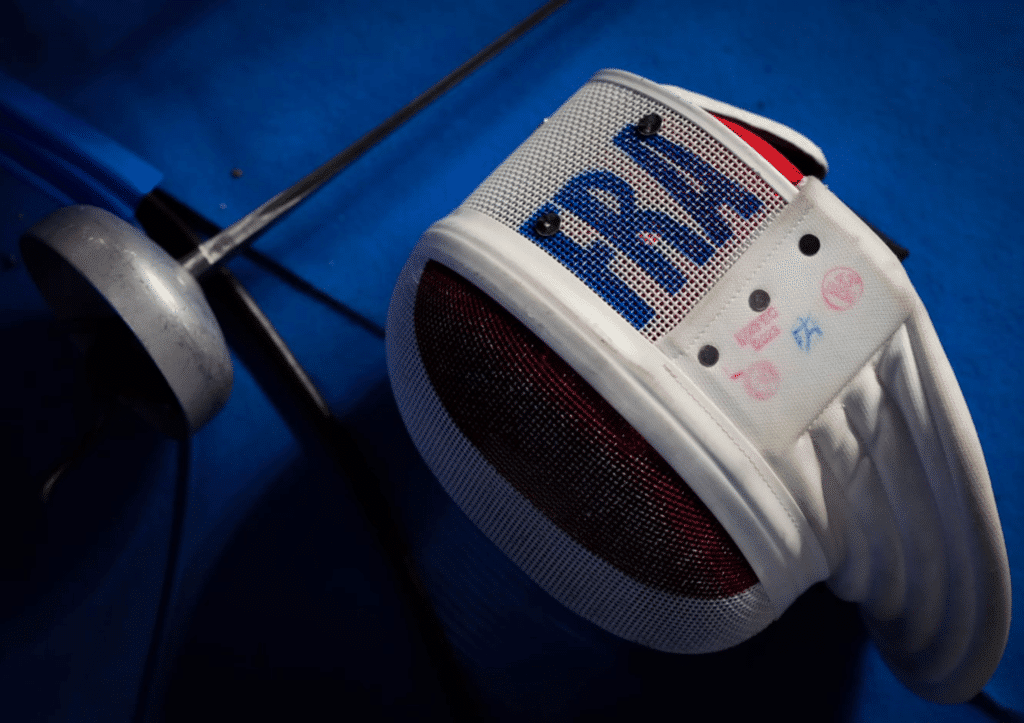
How to Check Each Piece of Your Fencing Uniform

(6 Important Items)

Below is the in-depth breakdown of how to check your fencing uniform, based on the six items most likely to affect your safety and performance.

1. Jacket: Your Strongest Layer of Protection

Prieur FIE women jacket collar

Your jacket is hit by blades, stretched during lunges, and pulled at by arm extension. Here’s how to check your fencing uniform starting with the jacket:

Inspect These Areas

Fabric Integrity

Hold it up to strong light. Look for:

  • Shiny spots (fiber thinning)

  • Areas where light passes through

  • Soft or papery texture

  • Surface pilling

Seams

Check:

  • Underarm panel

  • Elbow crease

  • Shoulder seams

  • Zipper base

  • Collar attachment

Any separation is a major red flag.

Zipper and Velcro

Both must secure completely and hold tension.

If your jacket is worn down, upgrade to a Prieur FIE-certified fencing jacket for long-term durability and better protection.

2. Pants (Knickers): High Tension Under Impact

800N FIE fencing pants back

Fencing pants endure explosive lunges and constant bending. Here’s how to check your fencing uniform for pant damage:

Check These Areas Carefully

Knee Panels

Look for:

  • Worn, thin patches

  • Shiny or stretched material

  • Fabric softening

Thigh and Hip Seams

These twist during footwork — inspect for seam pulling.

Crotch/Gusset Area

The most common failure point due to tension.

Elastic and Velcro Straps

Ensure:

  • Elastic rebounds

  • Velcro sticks securely

For replacements, see durable 800N fencing pants designed to withstand intense training cycles.

3. Plastron (Underarm Protector): The Hidden Safety Layer

Unisex underarm protector

Fencers often forget this piece when learning how to check your fencing uniform, but it’s essential.

What to Inspect

  • Fabric firmness — should feel strong and dense

  • Binding edges — should not peel

  • Strap elasticity

  • No soft or thin patches

Upgrading to an FIE underarm protector provides superior coverage and longer lifespan.

4. Mask: The Most Important Safety Device You Own

FIE epee pink mask front

Mask failures can be dangerous, so knowing how to check your fencing uniform absolutely requires a full mask inspection.

Inspect These 4 Key Areas

1. Mesh

  • Press gently with your palm

  • It must NOT flex

  • No dents, rust, or broken wires

2. Bib

Look for:

  • Fraying

  • Softened or thin areas

  • Separation from the mesh

3. Elastic Strap

Ensure:

  • Strong elasticity

  • No fraying or cracking

  • Clips fasten securely

4. Padding

Padding must be:

  • Firm

  • Attached

  • Not compressed or peeling

If your mask shows ANY of these issues, replace it immediately with an FIE-certified fencing mask for guaranteed safety.

For official safety standards, reference
USA Fencing Guidelines

5. Glove: Where Wear & Sweat Destroy Material Quickly

Foil and Epee fencing gloves

Gloves wear out faster than most pieces due to moisture and constant contact with your weapon.

Inspect These Areas

  • Palm: Smooth or shiny equals thinning

  • Thumb reinforcement: Common tearing spot

  • Finger seams: Watch for separation

  • Velcro cuff: Must close firmly

If you need a replacement, explore high-quality Prieur fencing gloves built for durability and strong weapon control.

6. Socks & Baselayers: Overlooked But Still Important

Sabre and foil fencing socks

These aren’t protective gear, but they impact your comfort and hygiene.

Check For

  • Holes

  • Stretched elastic

  • Fabric stiffness

  • Odor retention (fiber breakdown)

Even small issues can cause discomfort or blistering during a long tournament.

Full Pre-Tournament Safety Inspection

Now that you understand how to check your fencing uniform piece-by-piece, here’s how to perform a full inspection exactly like equipment control.

Tournament Checklist

Jacket

  • No tears

  • Strong seams

  • Zipper and Velcro fully functional

  • Correct CE / 800N labels visible

Pants

  • Gusset strong

  • Knees intact

  • Straps secure

Mask

  • Mesh solid

  • Bib intact

  • Strap tight

  • Padding secure

Glove

  • No palm holes

  • Velcro secure

Plastron

  • Fabric firm

  • Binding intact

Overall

  • Clean and presentable gear

  • All labels and certifications readable

For quick fixes before a tournament, bring the Prieur fencing repair toolkit, which includes the essentials for emergency adjustments.

How to Prevent Wear & Tear Before It Starts

Proactive care is half the battle when learning how to check your fencing uniform.

1. Air-Dry Everything

Heat and moisture degrade fibers faster than anything else.

2. Wash Properly

  • Cold water
  • Mild detergent
  • No bleach
  • Air-dry
  • No heated drying

3. Fix Small Issues Early

A small seam repair prevents major failures.

4. Use a Ventilated Bag

Consider the ventilated Prieur Elite Bag or Prieur Rally Bag to limit moisture buildup.

5. Rotate Gloves

Sweat breaks down material quickly.

6. Store Gear in a Cool, Dry Space

Avoid basements, garages, or hot cars.

Repair vs Replace: How to Decide

Repairable

  • Small seam gaps

  • Weak Velcro

  • Minor zipper issues

Replace Immediately

  • Mask mesh movement

  • Bib separation

  • Thinning jacket or pants

  • Gusset tears

  • Softened plastron material

If you need safer, longer-lasting gear, browse FIE-certified fencing equipment made for competitive athletes.

Final Thoughts

Now that you fully understand how to check your fencing uniform, you’re ready to extend the life of your gear, protect yourself from injury, and feel confident before every training session or tournament. A simple weekly routine gives you the consistency needed to stay safe on the strip — and prevents the stress of last-minute gear failures.

CART 1